Raspberry Pistachio Cake
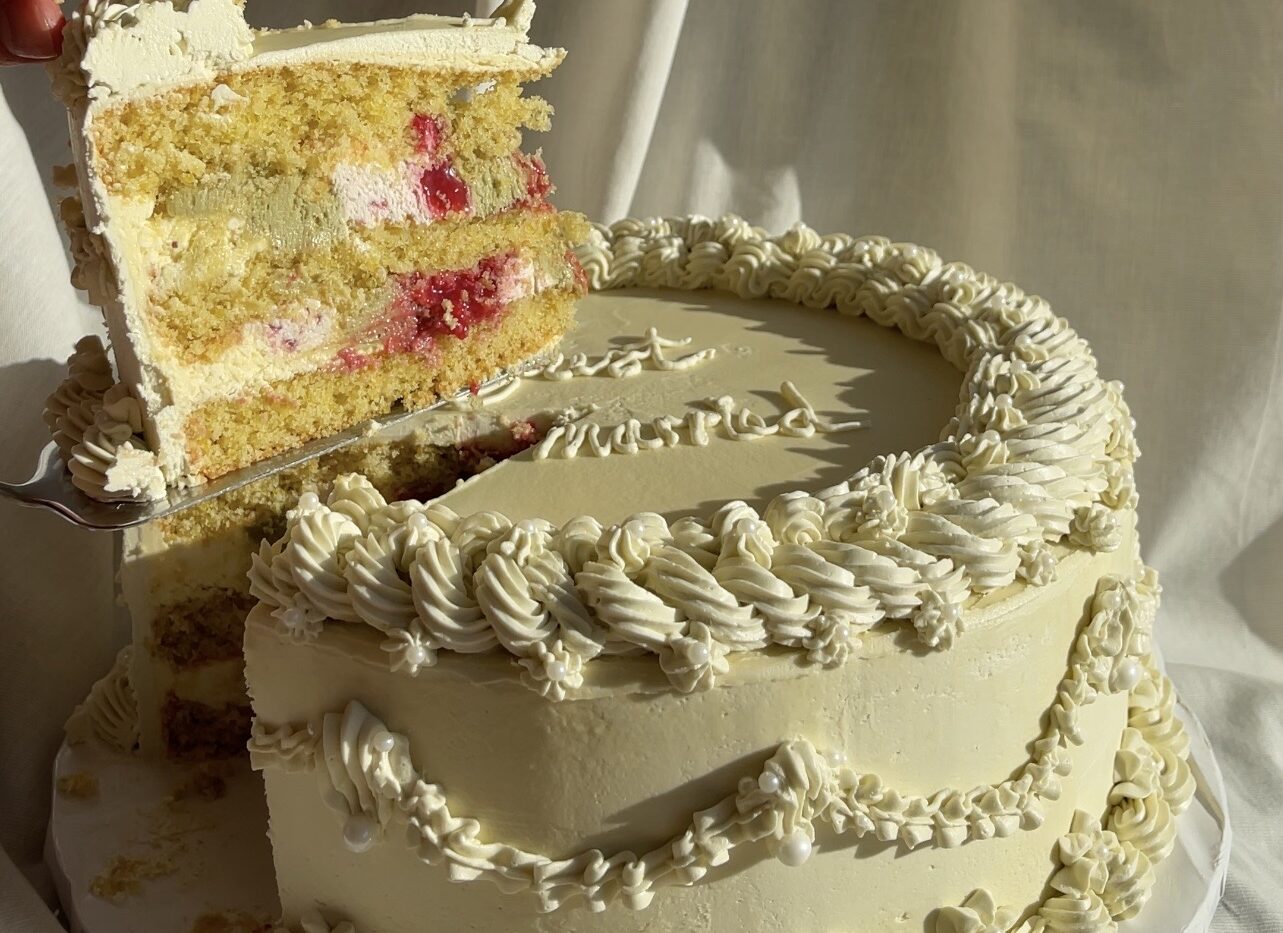
Four layers of pistachio sponge, soaked in syrup and stacked with raspberry cream, raspberry purée and pistachio cream, finished in Swiss meringue buttercream. A proper two-day project and the cake I actually made for my wedding.
Ingredients
Method
Day one — the sponge: heat the oven to 180°C and grease and flour two 20cm springform pans.
Blitz the pistachios with half the flour in a food processor until finely ground.
Mix the pistachio flour with the remaining flour, cornstarch and baking powder.
Beat the butter, olive oil and sugar together until smooth, then beat in the vanilla and lemon zest, followed by the eggs one at a time.
Mix in the flour mixture, then the milk, just until combined.
Divide between the two pans and bake for about 40 minutes, until a skewer comes out clean. For a wedding-scale cake, divide the batter across three 10" pans instead — about 390g per pan — and bake for 15 to 20 minutes; less is more here, you want them to stay moist.
Cool the sponges completely on a wire rack, release from the pans, and slice each one in half horizontally so you have four layers total. If you went for the wedding cake 3-layers, no need to slice them.
Wrap loosely rather than pressing clingfilm directly against the cake, or condensation will make it soggy. Chill until ready to assemble, ideally overnight.
For the raspberry purée, made at least a day ahead: simmer the raspberries until soft, then blend and push through a sieve for a completely smooth purée. Return to the pan with the sugar and lemon juice and simmer gently. Mix the cornstarch with a spoonful of the hot purée to loosen it, stir it back in, and cook until thickened. Take off the heat, stir in the cold butter, then transfer to a bowl, cover directly with clingfilm and chill overnight.
Day two — the fillings: for the pistachio cream, beat the mascarpone, Schmand, powdered sugar and pistachio spread together until smooth.
For the raspberry cream, whip the cream to stiff peaks. Separately, beat the mascarpone, yogurt, lemon juice and powdered sugar until smooth, then stir in the crushed raspberries. Fold in the whipped cream last.
For the Swiss meringue buttercream (method adapted from Sally's Baking Addiction): whisk the egg whites and sugar together in a heatproof bowl set over a pan of barely simmering water, without letting the bowl touch the water. Whisk until the sugar has fully dissolved and feels smooth rather than gritty between your fingers — about 70°C on a thermometer.
Move to a stand mixer and whip on medium-high until it holds stiff, glossy peaks and the bowl no longer feels warm — this genuinely takes 10 to 15 minutes, don't rush it. If it's struggling to stiffen, a short 10-minute rest in the fridge usually gets it there.
Switch to the paddle attachment and add the butter a tablespoon at a time, letting each piece incorporate before the next. Once it's all in, beat in the vanilla and salt. If it looks curdled or soupy at any point, keep beating — it comes together; a stubborn batch can be gently rewarmed at the edges over the simmering water for a minute, then rewhipped.
To assemble: set a cake ring around the first sponge layer and brush each with the syrup (bring the water and sugar to a simmer until dissolved, then let it cool slightly) — about 20 to 30ml per layer, no more, or the sponge turns soggy. Pipe a ring of buttercream around the inside edge as a dam. Fill the centre with raspberry cream, then a layer of raspberry purée, then a layer of pistachio cream. Repeat for the next two layers, then top with the final sponge layer.
Press down gently and chill for 2 hours before removing the cake ring.
Crumb coat the whole cake in buttercream and chill for at least 1 hour, or overnight.
Apply the final coat of buttercream, keeping the cake chilled between stages so it stays firm and doesn't turn greasy-looking. You can leave the cake simple in the buttercream coat or add decorations with different piping tips. I went for a vintage cake look.
This genuinely wants to be a two-day project: bake the sponges and wrap them, still a little warm, on day one, then soak, fill and stack on day two. Let the finished cake sit for at least 6 to 12 hours before serving, that's what makes it properly moist instead of just good. You can find the how to video here: https://www.instagram.com/p/DXetRyxDMd0/